Shuttle
This is the part that bolts onto your X carriage to mate and pickup each tool. You will need One Shuttle for the Printer. It will mate with a BACKPLATE that's made specifically for your toolhead. You will need one Backplate per tool. All shuttle designs have a vertical flag at the top that interacts with an OctoTap sensor mounted on the backplate to detect the tool and register taps on the build plate
Shuttle Options
Fystec CNC Shuttle
|

|
LDO Kit CNC Shuttle
|

|
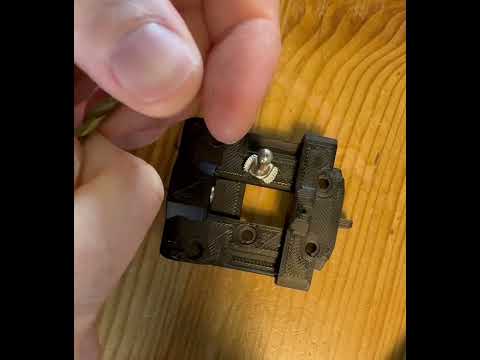
Print your own
Bill of materials
|

|
Printing shuttle
|

|
Assembling Shuttle and Backplates
In order to get proper matching set you should:
- insert pins in your best backplate (straightest)
- press bushings in the shuttle and ensure a smooth mating between the parts.
- inset 2x M3x8mm SHCS screws in the top 2 pins to secure, and a M3x6 or 8mm BHCS screw in the bottom pin. If needed, you can glue in the pins.
- if everything feels smooth, pop the bushings out and glue them in place using either superglue or epoxy
- see Heat Treating for fine-tuning the fit after gluing.
- see Backplate Preload for setting preload screws after assembly.
- be sure to test that the mating still feels smooth after the glue sets.
- You can now use the shuttle as a "master blank" for glueing the pins into all your backplates.
Currently pins may feel very loose, this is by design to allow for room for glue or epoxy (recommended) to set. Normally press fit is good enough for testing, but for actual use make sure to secure the pins properly.
Installing Shuttle
Print Belt Helper to help make this easier! This is especially necessary if you will change the front idlers to MiniBFI, which do not have a lot of margin for adjustment, so you need to keep tension in the belts while installing the shuttle.
- Consider taking the Shuttle off the rail carriage before installing belts. When using the BeltHelper to maintain tension, removing the shuttle from the rail will allow rotating the shuttle to thread the belts through from the rear without requiring as much fowl language
See the excellent Draftshift assembly guide for installation instructions.
Backplate Preload
(move this to backplate section?) Every backplate needs to be adjusted. Preload is meant remove all the wiggle when it's fully seated by preloading the pins onto the bushings. To set your preload you want to back the FSCS screws till they are just touching the magnest on the shuttle.
You can use a piece of paper per side to make sure they both have the same pressure. (Remove backplate, hold paper on screw, install backplate to shuttle, test how much friction it takes to remove paper. Adjust screws so both sides have equal friction, that the paper does not fall out unaided, and that the force required to pull it out is not unreasonable)
Big thank you to ButtSlark on Discord for this technique.
Not having a good preload is one of the reasons your input shaper graphs might look bad. Even if there is no more wiggle by hand, making small adjustments in the preload screws often improves input shaper graphs considerably.
Tips and Tricks
Heat Treating
If you printed the shuttle and backplate and things are just not smooth or you have slight binding, you can Heat Treat it and here is how.
- Fully assemble the shuttle and backplate with Bushing, Pins, Screws and Magnets
- Set your heat bed to 100-110°C
- Once at temperature, mate both parts fully, and set them on the bed with the backplate (tool side) down
- After 20+ minutes pick them up and slide them 3-4 times, then fully mate them once again
- With both parts still fully mated, set them down with the backplate (tool side) down someplace flat and at room temperature and let them fully cool without touching them for 5+ hours (i.e. turn the bed heater off and walk away)
- Try and slide them again and you should feel an improvement, you can try this multiple times if you are still not satisfied
Big thank you to unguided-wanderer on Discord for this technique.
More Aggressive Heat Treating (Pins Still Not Smooth)
If the standard heat treating method above doesn't resolve binding or if your tool still slowly drags itself into place when putting it on the shuttle, you can use a more aggressive approach to mold the pin housing:
Pin alignment is crucial for smooth operation. It's possible that the plastic prevents the pin from aligning perfectly with the shuttle, but you can mold the pin housing of the backplate by heating up the pin:
- Heat up the pin with a soldering iron
- When it's hot push it into the backplate with pliers (don't burn yourself!)
- While still hot put the backplate or tool onto the shuttle and make sure it seats fully.
- Wait 5-10min to let it cool down and settle.
- Tighten the pin with a screw or epoxy it in place.
It should now mate much smoother, celebrate!
Big thank you to @WHYYTE on Discord for this technique.
Cleaning out bushings
Sometimes the bushings aren't debured or do not slide well when you recieve them.
- Find a drill bit 4mm or smaller (I’m using 3mm in the video at the link)
- Using your thumb, apply pressure onto the bush and roll back and forth on the drill bit.
- Test on the pin again
- Rinse and repeat.
- Some bushings take multiple tries, but try not to over do it, just enough that the bushing falls on the pin.
- Big thank you to
BT123on Discord for this technique.
Mods
- Split keeper for 9mm belts/monolith
- Belt helper 3mm spacing for Micron/V0
- Belt lock (discord link)
- DO NOT USE, REQUIRES UPDATE TO V1.1: ~~Shuttle with 5.5mm OD bushings~~
FAQ
Quick Links:
- Do I need an OctoTAP board per toolhead?
- My magnets don't fit in my backplate
- My shuttle and backplate don't mate well
- My dimensions are spot on but it still doesn't mate smoothly
- Do I really need N52 magnets?
- How do I install the magnets?
Do I need an OctoTAP board per toolhead?
Yes, in order to detect which tool is actively on the shuttle each toolhead should have an OctoTAP board. It has an optical sensor whose beam gets broken by the flag of the shuttle (the little protrusion at the top of the shuttle). That's how the software knows which tool is actively on the shuttle and it can also detect whether a tool change has been succesfully performed (= crash detection).
My magnets don't fit in my backplate
Measure your magnets with a caliper, cheaply sourced magnets often are not exact 6x3mm. Check your print settings and make sure your printer has calibrated the filament shrinkage to perfection.
My shuttle and backplate don't mate well
If you have have a CNC shuttle it's absolutely critical that you calibrate your filament shrinkage. With a printed shuttle you have more tolerance for part dimensionality because both shuttle and backplate will have the same amount of shrinkage, but with a CNC shuttle the backplate pins have to line up exactly. If you measure the distance between the outsides of the pins you should have exactly 39mm, even 0.1mm off can cause the backplate to bind.
My dimensions are spot on but it still doesn't mate smoothly
If you have pins that are held in by screws, mate with the shuttle and then tighten the pin screws, that way the pins are perfectly aligned with the bushings of the shuttle. Then bed in your shuttle and backplate by running a probe over and over again with PROBE_ACCURACY SAMPLES=100 (put something hard under the nozzle so you don't dimple the PEI plate).
Do I really need N52 magnets?
N52 magnets are much stronger than N35 and will make the shuttle/toolhead more rigid. N35 magnets might cause reliability issues and introduce more play.
How do I install the magnets?
If you have screw in magnets just screw them in place. If you have normal magnets use two component epoxy that doesn't immediately set, that way you can press in the magnet and adjust and align the magnet perfectly flush with the backplate or shuttle. Do not use CA glue (=super glue) if you have an enclosed printer, the heat will make it loose its bond over time and the magnet will pop out. Two component epoxy is usually rated for higher temperatures.
I have a lot of variance when I run PROBE_ACCURACY, sometimes my QGL even fails to level
- Make sure your shuttle screws are tight in the X-rail carriage, they might loosen over time.
- Make sure your OctoTAP board is not loose on the backplate of the tool
- Make sure the screws holding the backplate to the toolhead are tight
- If you have a printed shuttle, make sure the shuttle hasn't cracked anywhere, especially near the bushings at the top. Any play in the bushings will cause the toolhead to be less consistent in probing.
- Check your umbilical is not pulling on the toolhead - especially at the front corners - causing the optotap to activate earlier or later than in the bed centre